


If you slide the battery door shut, it usually closes, but almost not. The cell looks like a normal AA, and the label says “AA,” but the battery tray won’t accept it—or it fits so tightly you’re afraid you’ll rip the spring contact right out.
When a battery compartment is designed with minimal clearance, "close enough" becomes "won't fit." While it is easy to blame an oversized battery, the problem is often a combination of small manufacturing differences and device wear known as tolerance stack-up. A battery might be a hair longer, the wrapper a hair thicker, and the tray itself might have minor imperfections.

When you are stuck with a tray that is too tight, the goal is to fix the underlying mechanical cause—not to force the fit. Forcing a stubborn cell into place can permanently crush the battery, crack the housing, or destroy the contact points. This practical maintenance tutorial covers how to safely clean corrosion, clear away manufacturing plastic imperfections, and assess spring travel without breaking delicate contacts.
Step 1: Confirm You’re Not Fighting the Wrong Problem
Before reaching for any tools, rule out basic placement errors that mimic a tight compartment:
● Confirm you are not accidentally mixing AA and AAA batteries in the tray.
● Double-check that all cells are oriented in the correct direction.
● Inspect the compartment to ensure an adjacent cell isn't already seated incorrectly underneath a contact tab.
Step 2: Clean Corrosion and Sticky Residue
One of the most common causes of a tight squeeze is a layer of corrosion residue, whether visible or invisible, or a sticky leakage film. This thin layer builds up on the contacts or walls, increasing physical friction and reducing the available clearance inside the tray.
● The Fix: Dip a dry cotton swab in a small amount of isopropyl alcohol. Gently wipe down the metal contact surfaces and plastic guide rails. Isopropyl alcohol effectively breaks down stubborn, sticky film and removes residue without damaging the device tray's structural plastics. Let the compartment dry completely before testing a battery.
Step 3: Remove Manufacturing Plastic Flash
During the injection-molding process, plastic device trays can develop "flash"—a tiny, unintended ridge or burr of leftover plastic along the seam lines or internal rails. If a battery tray were engineered with zero wiggle room, this tiny molding variation would be enough to wedge against a battery wrap, preventing smooth insertion.
● The Fix: Inspect the tray's internal plastic walls under a bright light, looking for small raised bumps or ridges. Using a precise hobby knife or a fine-grit scraping tool, shave away only the raised plastic flash, incredibly gently. Be careful not to gouge the main walls or thin out the structural casing.
● Safety Warning: Never use these scraping tools on the battery itself. Do not sand or shave a battery's metal can or protective outer wrapper, as doing so creates a severe short-circuit risk.
Step 4: Assess Spring Travel and Protect Contacts
Battery contacts are springy by design, but they rely on mechanical travel to accommodate the full length of a cell. If a tray has almost no spring travel, or if a spring has stiffened or compressed unevenly over time, a standard battery will jam.
● The Fix: Using a clean, non-conductive tool (such as a plastic stylus or wooden stick), gently press the spring contact to estimate how much travel you have before it bottoms out.
● What Not to Do: Do not attempt to "bend the contacts until it works" or pry them up aggressively. Over-bending battery contacts permanently weakens their spring pressure, leading to loose connections and flickering power. It can also snap the delicate weld points holding the contact to the internal circuit board. If the spring lacks sufficient travel, it is far safer and cheaper to swap to a different battery cell than to try to reshape the device's metal hardware.
Selecting the Right Cell for the Tray
If you have cleaned the tray and cleared the plastic flash, but the compartment remains exceptionally tight, stop fighting the tolerance limits. The safest answer is to use a cell that matches the device's intended physical form factor.
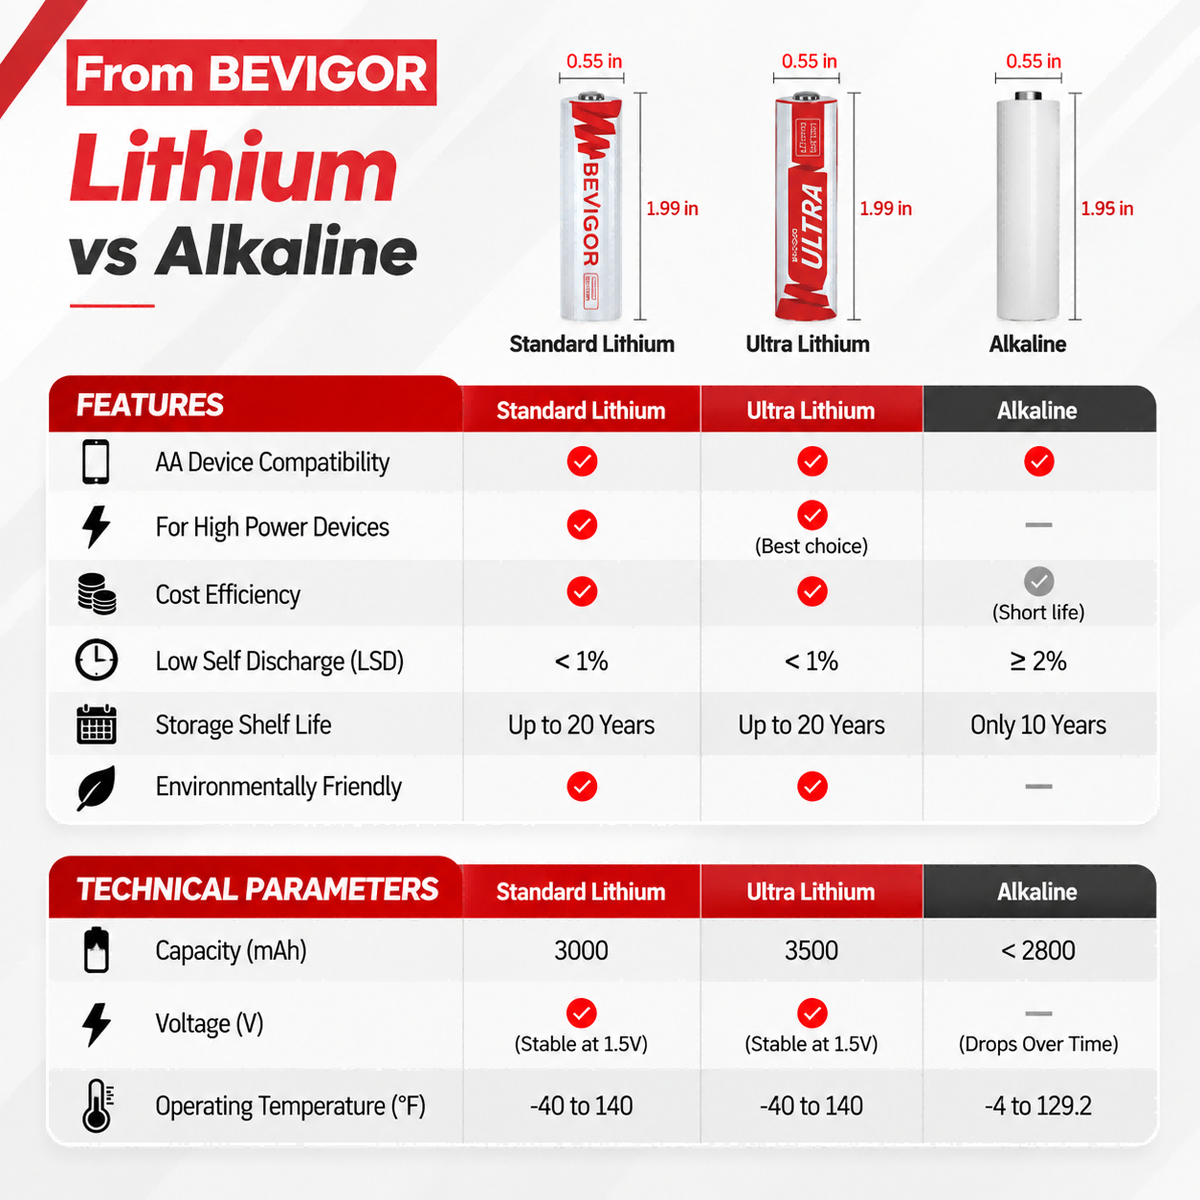
For devices engineered around highly predictable, single-use dimensions, choosing standard, unmodified AA Batteries or AAA Batteries ensures a reliable fit without friction. If you prefer a rechargeable setup, avoid bulky cells with internal voltage-regulation circuits and choose a uniform Rechargeable AA & AAA batteries kit that aligns with nominal sizing standards. For a complete look at how space constraints and battery geometry dictate product design, consult the Lithium AA vs Lithium AAA Battery analysis to guide your hardware applications.







Aktie:
The CR123A vs. 16340 Voltage Trap: Protecting Your Electronics
Why 1.5V Rechargeable Lithium AAs Jam Your Devices (And How to Fix It)